Made in the U.K. they are designed to improve the lives of women working in food, they are made to invest in, work in and last the course.
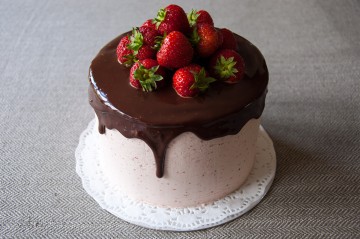
Vicky asked me if I would mind sharing the recipe for the cake I brought along the shoot in time for Valentine’s Day as it’s all pretty in pink, so here it is.
Ingredients
Chocolate buttermilk cake
- 200g softened, unsalted butter
- 200g caster sugar
- 100g dark 70% chocolate, melted
- 4 medium eggs, room temperature
- 200g self raising flour
- 50g cocoa
- 1/2 tsp bicarbonate of soda
- 1/4 tsp baking powder
- 100g buttermilk, at room temperature
Raspberry compote
- 350g bag frozen raspberries
- 95g caster sugar
- 1 lemon, squeezed
Sugar syrup
- 75g caster
- 75g water
Buttercream
All ingredients need to be at room temperature.
- 115g egg whites (about 4 medium egg whites)
- 230g caster sugar
- 345g unsalted butter,
- 3 tbsp raspberry compote
Method
Pre heat the oven to 175c, fan oven. Butter and base line 3 x 6” cake tins.
- Melt the chocolate in a bowl over a pan of simmering water, once fully melted set aside to cool slightly. Add the butter and caster sugar to a mixing bowl and beat for around 3-5 minutes until pale and fluffy. Add in the melted chocolate and beat again to incorporate, scrape the bowl down in between if needed so everything is evenly mixed. Add the eggs in one at a time, beat until each egg incorporates into the mixture. Sift the flour, Cocoa, bicarbonate of soda and baking powder into a bowl, add this to the cake mixture in two additions, making sure everything is mixed together, finally add in the buttermilk and mix until just combined. Divide the cake mixture between your three cake tins, if you want to weigh it like I do it’ll be around 340g per tin, this makes sure your layers are nice and even. Smooth the cake mixture out evenly in the tins, place in the centre of the oven and bake for around 25-28 mins depending on your oven. Test with a skewers in the centre of the cake, it should come out clean when the cake is baked. Leave to cool on a wire cake cooling rack. If you are going to assemble your cake the following day I’d wrap them up so they don’t dry out.
- While the cakes are baking make the syrup and the compote, these also can be done the day ahead and stored in the fridge. To make the syrup put the caster sugar and water in a saucepan, bring to a boil then turn down to a simmer until all the sugar has dissolved, I leave to cool, pour into a clean jar and store in the fridge until needed. It can be kept up to two weeks. To make the compote, put the frozen berries, caster and lemon juice into a pan on a medium heat, once it has started to bubble away reduce the heat to low and let it simmer for around 10-15 minutes, be careful it doesn’t catch on the bottom and burn, give it an occasional stir. After around 15 minutes it sounds have thickened up a bit, I then pass it through a sieve into a clean bowl and let it cool, cover it, then transfer to the fridge. Again this keeps really well, can be stored for a week in the fridge if you like.
I’d usually do all the above steps the day before then make my buttercream and assemble the following day because the cake will be easier to work with, but of course you can do it all in one day too if you wanted.
- To assemble, bring any compote out of the fridge to come to room temperature, it needs to be the same temperature as the buttercream to incorporate properly.
To make the buttercream place the egg whites in a clean, grease free mixing bowl. I use the bowl from my freestanding mixer to make things easier. Add the sugar to the egg whites and place over a saucepan of simmering water, make sure the mixing bowl isn’t touching the water. Whisk the egg whites and cater sugar over the heat until the sugar has dissolved and the temperature of the mixture reaches 65 ℃. If you don’t have a thermometer, rub the mixture between your fingers, the sugar should be dissolved and the mixture will be warm to touch. Place the bowl back on the freestanding mixer making sure the whisk is already attached and whisk on a high speed until you have a glossy stiff meringue. Alternatively use and electric hand mixer until it reaches the same stage. The meringue should have cooled down at this point so add the butter a piece at a time still whisking at a high speed. Once all the butter has been added you should have a lovely rich buttercream.
Next add the raspberry compote to your buttercream. Whisk the raspberry and buttercream together on a high speed, it does take a while to all come together. It may look curdled at one point but trust me, keep whipping and it’ll come together. Scrape the mixing bowl down in between whisking so it’s evenly mixed through. It’s should end up as a lovely silky pink buttercream.
- To assemble the cake, unwrap your cakes, slice the top off each one to make them level, I use a wire cake leveller. Brush each layer with sugar syrup. Place the first cake cut side up on a cake board or plate. Generously cover with the raspberry buttercream, next I usually pipe a circle of buttercream to hold in the filling and stop it leaking out when I place the next later on top. Put some buttercream in a piping bag, you can use a plain nozzle if you like, pipe a boarder around the outside of your cake then fill in the centre with some of your compote, a couple of tablespoons should be enough for each layer. Place the next cake layer on top, again cut side up and repeat the process. Place the final cake on top of that but this time cut side down. Next I cover the whole cake in a thin layer of buttercream to crumb coat and put it in the fridge to chill and firm up for about half an hour – you want your cake to be firm to touch by the time it's chilled.
Now you are ready to do your final neat layer of buttercream. I like to use a turntable and an offset spatular and a straight sided plastic or metal scraper to get a good finish. Put a pile of buttercream on top of your cake and start smoothing it out as you rotate it. Tease the buttercream down the sides of the cake, you can always add more buttercream if you need to fill any gaps. I just keep filling and smoothing until I’m happy, thats what I love about buttercream covered cakes – you can keep adding and smoothing as much as you want. It does take a bit of practise to get it super smooth but I find it quite a therapeutic process. Once you are happy with the finish decorate how you please, I love using small meringues, fresh berries, macarons, and chocolate shards. There is a quick tutorial on how I make my shards in my Instagram highlights if you’d like to have a go at them.